Assignment #3: RetouchingObjective: Learn/practice the following skills:
- Assess a historic or damaged image for the most effective and efficient manner to repair
- Use selection tools, cloning tools (rubber stamp), healing tools and history brush
- Colorize an image to create an antique look.
- Make a final image that is pleasing and true to the spirit of the original
Step 1: Open the file “RetouchingMaster1.psd” or “RetouchiingMaster2.psd. Notice the level and type of repair required on these images. You may also choose an image of your own for retouching. We will focus the retouch of an image in black and white. You will need to scan or re-photograph your image in order to work on it in Photoshop. Gear your planning for a final output on an inkjet printer on 81/2 x 11” paper. Size your image and resolution accordingly.
Step 2: You can shift your image to gray scale. This will often hide stains and saves effort. Sometime you can visit the channels and find a channel that has less damage. Copy this channel and make a new file before beginning your work.
Step 3: Use the any of following techniques to repair the image:
Technique A: Use the dust and speckle filter and turn up the intensity until all the cracks and flaws are blurred. Make a snapshot. Undo the blur (click on the step before OR click the key stroke.) Now, click on the history brush and then click on the box next to the blurred snapshot. You will paint with the history brush to this image. Get an appropriate size brush and paint away those cracks and scratches. Try the darken blending mode to help minimize the blurring effect.
Technique B: Use the rubber stamp tool to replace areas with other areas. Click with the option key down to choose your source point then paint over a damaged area. Watch for the pattern and light and dark areas to make visual sense. Try the rubber stamp tool aligned and unaligned. Resample often (option-click).
Technique C: Use a selection tool to make a selection near the size of the large damaged spots of the image. Feather the selection tool slightly. Move the selection to an adjacent area that has appropriate pattern and copy. Paste the selection and move it over the damaged area. Adjust areas that donʼt match with the clone tool or use the eraser then make a new selection.
Technique D: Use the healing brush to replace areas with other areas and blend the results. Click with the option key down to choose your source point then paint over a damaged area. Again, watch for the pattern and light and dark areas to make visual sense. Resample often (option-click).
Technique C: Use a selection tool to make a selection near the size of the large damaged spots of the image. Feather the selection slightly. Use the patch tool to pick up photographic detail and blend with the damaged area.
Step 4: Make an appropriate background to offset the portrait. Option A: Using a white background, create an oval vignette edge around the entire image. Option B: Repair the background using the same tools as above. Option C: Make a new background using the gradient tool or other experimental techniques.
Have fun.
Step 5: Bring the image back to its sepia origins by changing the mode to RGB then clicking the colorize button in the hue/saturation box. Play with the sliders to get the color you want. (Image: Adjust: Hue/saturation). Consider using adjustment layers. Consider colorizing the background and portrait differently. You can also tint the photograph using the suggestions in Tutorial 5 in Module Eight and in Lesson three in your book.
Step 6: Save early and often. Consider saving versions as you work so that you can try different techniques.
Step 7: Print to an inkjet printer or send to a printing service. Read Chapter 12 for help and consult the book with your printer or talk with your printing service for advice.
You will turn in your files to the Assignment area of the Etudes classroom by the deadline. The print is due with your final portfolio. DUE: Repaired file, original file, paragraph on your procedure and three things you learned from this assignment.
Save all your work You will need to turn in work from all assignments on your final cd.
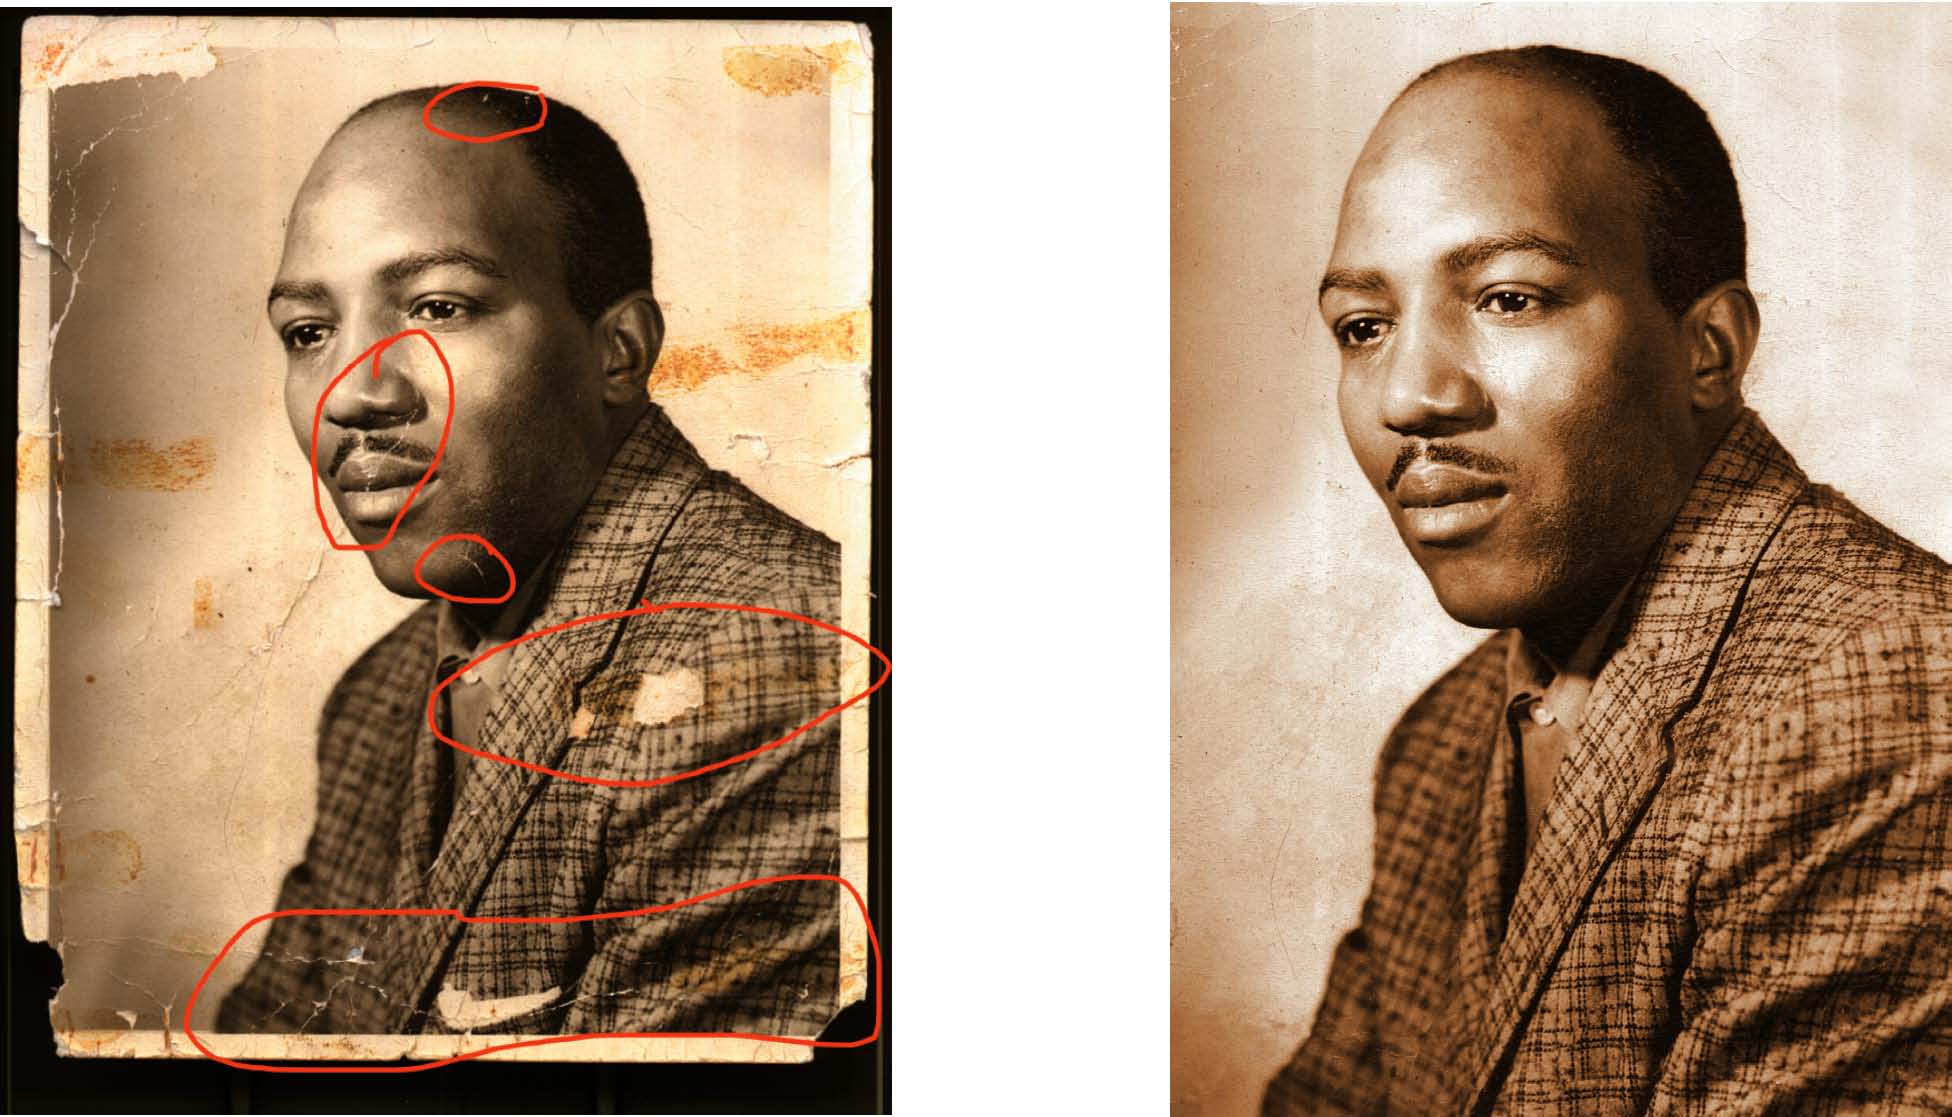
Before and after....